Microsoft’s Clip Art, long a staple of presentations from the classroom to board rooms, is finally at its end, joining the ranks of Clippy, Geocities, and the abacus. Those sometimes-peculiar yet familiar images that the earliest memories of PowerPoint and Word contain are no longer accessible from Microsoft’s website, and are soon to disappear from Office’s image browser itself. So, what are you to do when you need to add some color to your class presentation or office guide?
The good news is, it’s a lot easier than you’d think. However, before the not-so-secret secret is shared, we must address the obvious solution that many would try: just search Google for “cartoony cat talking” (or whatever you had in mind), and just stick that into your document. Sounds easy? Right. Problem is, it isn’t necessarily legal, moral, or right. Without getting into the legal quagmire that is copyright law, for common purposes, you can get away with using those Googled images of kittens in your email to your friends, but when creating a College document, not so much. The essence of the problem is that some enterprising individual went out and painstakingly photographed their cat before sticking said image on the internet for timeless enjoyment. They (in most cases) own their image, and the rights attached to it. You, not so much. Sure, you could include a credit to the photographer for their work, but unfortunately, that doesn’t always fulfill the legal requirements, especially when you’re acting on behalf (or within) the College.
So, time for a better plan. Office has been kind enough to provide some better options for adding color to your files than the very-dated and eyebrow-raising Clip Art in the form of integrating its Bing Images search.
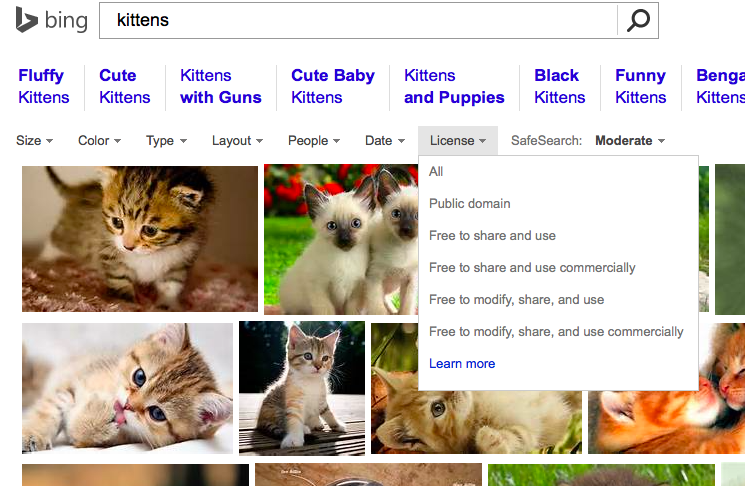
Contrary to what Google desires you to know, they are not the sole search provider for the planet, with a variety of other options out there, including Microsoft’s Bing. While the phrase “just Bing it” hasn’t quite caught the same musical note as “just Google it”, they’re steadily improving.  But regardless of your stance in the search engine market, they have a handy default, when image searching, to show images that are licensed under Creative Commons. This, in general, means that the owner of the image allows anyone to use, publish, or redistribute them, without a copyright claim being involved. In other words, feel free to use. Bear in mind that you should still look at the particular Creative Commons license that it is distributed under, as many still require attribution, and others have other restrictions (or lack thereof).
If you’re in an Office application, and eagerly want to insert an image just as you used to with Clip Art, you can go to the ribbon, click Insert > Online Picture > Bing Images.
While Bing is Office’s default for images, and an easy way to find them online, you can do similar with Google image search, When searching, click Search Tools > Usage Rights and select an appropriate right, such as “Labeled for Reuse”, and browse away. Just as with Bing’s search, check to see what the actual license for the image is before putting it into a College document, to ensure that the attribution and use is appropriate.
Happy Binging, Googling, Duck-Duck-Going, and kitten browsing!

